diy moss abstract wall art: step-by-step guide using a shadow box Frame
Hey there! Just a heads up—some of the links in this post are affiliate links, which means I may earn a small commission if you make a purchase through them. It doesn’t cost you anything extra (promise!), but it helps me keep this blog up and running so I can continue sharing budget-friendly decor tips with you. I only recommend products and services I genuinely love and think you will too. Thanks for supporting Nesting Nook—you’re the best!
My DIY Moss Wall Art!
Butterflies optional! I just thought they added a enchanted forest vibe to it.
Moss art is a beautiful way to bring the tranquility of nature into your home, adding texture, color, and a unique organic element to your decor. Creating moss abstract art using preserved moss and a shadow box frame is an easy, budget-friendly DIY project that results in a stunning piece that looks both modern and earthy. At the end of this post, you’ll find links to everything you’ll need to create this fun wall art.
Here’s how you can make your own moss abstract art in just a few simple steps.
Materials You’ll Need:
1. Shadow Box Frame (size of your choice)
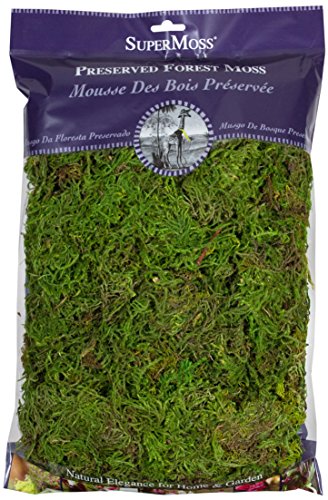
2. Preserved Moss (available in various colors and textures such as sheet moss, reindeer moss, or cushion moss)
3. Hot Glue Gun and Glue Sticks
4. Scissors
5. Floral Foam or Styrofoam (to create 3D look by making certain areas taller than others)
6. Optional: Decorative Elements (such as small stones, dried flowers, or twigs for added texture)
Step 1: Choose Your Frame
Select a shadow box frame that suits the size and scale of the moss art you want to create. Shadow boxes are ideal because they allow for depth, giving your moss art a three-dimensional quality. You can find shadow box frames in various sizes at craft stores or online. Consider the color and finish of the frame, ensuring it complements the look you want for your moss art.
Step 2: Plan Your Design
Before you start gluing, take some time to plan your design. Moss abstract art is all about creating organic shapes and patterns. You can sketch out a rough design on the backing if you want a guide to follow, or you can go for a more freeform, intuitive approach. Think about where the foam pieces will go underneath the moss in order to create a 3D appearance.
Step 3: Start Gluing the Foam
Using your hot glue gun, begin gluing the the foam to the shadow box backing. Apply more foam in some places to give the moss you glue next more height. Leave bare the areas that you want a “valley” in your moss art.
Step 4: Start Gluing the Moss
Using your hot glue gun, begin attaching the preserved moss to the backing. Apply a generous amount of glue to the back of the moss and press it firmly onto the surface. Work in sections, arranging the moss according to your design. Mix different types of moss to create varied textures and colors, giving your piece more depth and interest.
Tip: If you're working with large pieces of moss, start with those first to establish the main areas of your design, then fill in the gaps with smaller pieces.
Step 5: Add Decorative Elements (Optional)
To add even more visual interest to your moss art, consider incorporating small decorative elements like stones, dried flowers, or twigs. These can be glued directly onto the moss or around it to enhance the abstract design. These elements will also add different textures and create a more dynamic piece.
Step 7: Display Your Moss Art
Your moss abstract art is now ready to be displayed! Hang it on a wall, place it on a shelf, or incorporate it into a gallery wall. Moss art adds a touch of natural beauty to any room, and because it’s made with preserved moss, it requires little to no maintenance.
Additional Tips:
- Experiment with Colors: Moss comes in a variety of colors, so don’t be afraid to experiment with bold greens, deep browns, or even dyed moss in unique shades.
- Lighting: Consider where you’ll display your moss art. It looks especially striking when highlighted with soft, ambient lighting that accentuates its textures.
- Maintenance: While preserved moss doesn’t need watering, it’s best kept out of direct sunlight to avoid fading.
Creating your own moss abstract art is a fun, creative project that results in a unique piece of decor that reflects both nature and modern design. With just a few materials and a bit of imagination, you can craft a stunning piece that brings the outdoors in and adds a beautiful, organic touch to your home. Trust your gut as to what looks good or find some references that inspire you. Happy crafting!
xo


